hero-lg.jpg)
Perfecting acrylic nails takes skill and precision. From mastering your liquid-to-powder ratio to getting the arch placement right and avoiding over-filing, we asked leading nail experts to share their best acrylic application tips and common mistakes to avoid
Whether you're a new nail tech or an experienced pro, here’s how to create flawless, long-lasting acrylic sets.
Common acrylic nail mistakes and how to avoid them
“When applying acrylic product it’s important to get the application perfect first time as you don’t want to rely on filing to get the structure of your nail,” says Georgie Smedley, a nail professional and educator with over 30 years' experience who was responsible for launching Gelish's distribution in the UK.
“Minimal filing means you’re cutting down your work time because you will be well practised in getting the product on, and then it’s just a case of refining the nail with your file. This will also help reduce repetitive strain injury (RSI), which a lot of nail techs experience due to over filing.”
Nail tech, educator and founder of Manicured London, Tinu Bello adds: “Over filing of the side walls is a pet peeve of mine as there should be good symmetry between the walls and the shape. It’s nice to create a shape that looks good from the front but as soon as you turn the nail to the side you’ll notice the side walls have been filed away too much. Pay attention to your side walls more so than the shape, and make sure they are really straight.”
How to get the perfect acrylic liquid-to-powder ratio
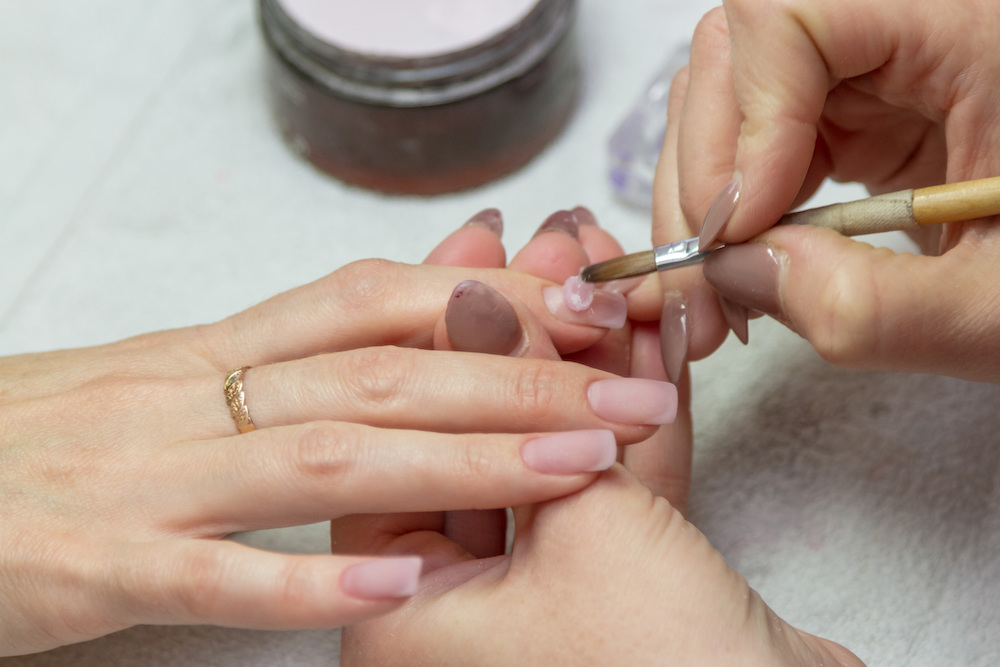
“Different acrylic systems will have different ratios you need to follow, so always refer back to your manufacturer’s guidelines for the best advice. When working with your powder-to-monomer ratio, it ideally needs to be quite dry because if it’s too wet then it’s going to run into the cuticles,” explains Bello.
“When I’m teaching techs how to do acrylic, I make them pick up beads and place them on laminated paper because the texture is similar to the nail plate. If the bead stays taut in one place then it’s got a good ratio, but if it spreads out of its ball then it’s too wet.”
She adds: “The most important thing is you don’t want a runny bead. The runnier it is, the wetter your brush will be, and then the more problems you’ll make for yourself as it will seep into the cuticles and side walls, creating a mess. If you practice picking up your beads, you’ll soon be able to determine your ratio correctly.”
How salon temperature affects acrylic nail application
“When you’re using liquid and powder it is really important that the temperature in salon is right because if it’s too low then the product will have difficulty in curing or polymerising, which is what makes the product set,” says Smedley.
“You have all these little monomers that need to link together, and they rely on heat within the client’s fingers as well as in the salon environment for those links to happen. If you have a low temperature in salon then you’ll have crystallisation around the outside of the nail and, therefore, when you file, you’ll have quite a bit of the acrylic missing because of that.”
How to do acrylic nail infills correctly
The aim of an infill service is to make the nail look brand new again and this involves removing any lifting product, prepping the nail and applying new acrylic.
"Never file directly over the lifted area as you may find that you make the lifting worse. You should file right next to the lifting, on the edge of product that is still attached, leaving natural nail prep until you’ve removed it,” advises Jan Soar, managing director at WOOHOO Salon.
“The product has lifted for a reason, so you need to ensure the natural nail is perfectly prepped before reapplying product, otherwise you’ll just experience lifting again. Plus, it needs to be removed to make sure bacteria doesn’t get sealed in when fresh acrylic is applied.”
She adds: “When moving on to application, a good-quality liquid and powder should reapply easily, colour-matching the existing product so no join can be seen. Also, if you keep product application thin at the cuticle, then infills are easier to do and less lifting will be present.”
Perfecting acrylic nail arch placement (apex placement tips)
“The stress point is in the middle of your client’s nail and that it where your arch placement should be. It should transcend nicely from the cuticle to just over the free edge, and shouldn’t be too high or bulgy,” explains Bello.
“If you’ve put the arch placement on too high, the best thing to do is carry on and then, unfortunately, this is where the arm work comes in. You are going to have to work hard to file that nail down.”
She adds: “Doing the arch placement too low can be an issue too, as well as starting too thick at the bottom of the nail bed. Another thing you need to think about is symmetry because if the arch placement isn’t symmetrical then you will do it wrong.
“If the side walls aren’t straight, then the apex will receive the stress, which isn’t good for the client’s natural nail. Your side walls have to be as straight as a ruler, there should be no indents and you shouldn’t be able to see the natural nail.”
Can you mix gel polish with acrylic liquid?
“The answer to this question is no and I’ll try to be brief,” says session tech, author and brand ambassador for CND, Marian Newman. “Firstly, no mixing should be done without the express suggestion from the manufacturer – if they understand what they are doing and have an in-house scientist.
“Gel-polish and acrylic have two completely different polymerisation processes. One needs a photo initiator with a correct wavelength of UV energy, while the other needs the matched system of initiator (polymer powder), catalyst (monomer liquid) and heat energy. The presence of oligomers in the UV gel-polish will interfere with the proper cure of the liquid and powder (L&P).”
She adds: “L&P starts to polymerise immediately and will stop the oligomers moving around to polymerise with other oligomers. The result will be a lot of uncured monomers that can leach into the nail plate and surrounding skin while wearing, and then released on removal – either via buffing or soaking – all over the skin and in airborne dust to create allergies.
“The industry seems to be creating a culture of uneducated ‘chemists’ that are playing with the health of their clients.
“Once upon a time some brands developed coloured ‘drops’ to add to the liquid monomer to change its colour. If this is developed properly then it may be OK, but it has disappeared, probably because it wasn’t efficient in a ‘proper cure’.
“It’s just another step in lowering the quality of this career instead of elevating it with sound education and understanding of the hazardous chemicals we work with.”
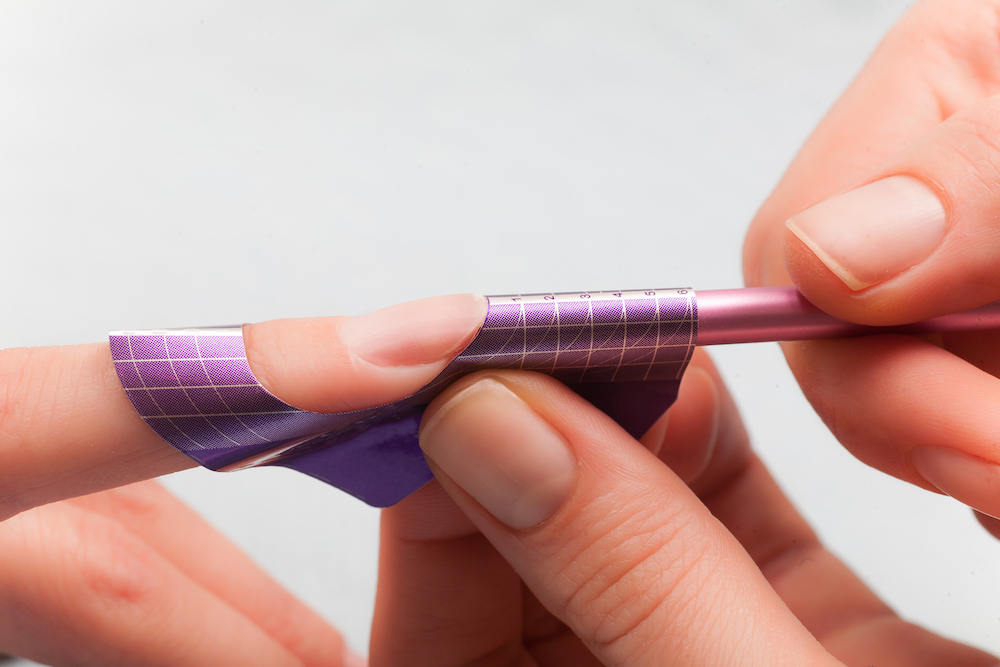
Acrylic nails: Should you use tips or forms?
“Both methods are fine but, in my opinion, forms are a more advanced skill. When you’re using tips, it is much easier and quicker than when you’re cutting and using a form, which has to be placed correctly,” says Bello.
“However, you still need to adapt tips to the client’s nails in the same way you would forms as this is the key to delivering a good set of acrylics.”
Best tools and brushes for acrylic nail application
“A lot of people on YouTube use quite large brushes to do acrylic sets and the reason they use a bigger brush is because it holds more of the monomer product, so you can then get onto a one bead application which is quicker,” explains Smedley.
“However, there are some downfalls with this. When doing this method, you’re holding a lot of liquid in your brush and you then risk that liquid going all around the cuticle area and onto the skin.
“If that repeatedly happens then the client could become allergic to the product because their skin is overexposed. So, it’s very important you choose the right size brush for you and don’t try to get everything on in one application with a really big brush.”
How to pick up the perfect acrylic bead: Brush wiping tips
“This varies depending on the acrylic system you’re using, so check with your product manufacturer. However, a top technique is to dip your brush, wipe one side against the side of your dish, and then use the wet side to pick up the bead. I don’t tap into my acrylic either – I just pick up a ball of acrylic. With practice you will start to find what method works best for you,” explains Bello.
Acrylic nails: FAQs
- What’s the ideal acrylic powder-to-liquid ratio?
It depends on your system, but the bead should stay firm and not spread – a sign the ratio is balanced. - Can cold salon temperatures affect acrylic curing?
Yes. Low temperatures slow polymerisation and can cause crystallisation or patchy application. - Is it safe to mix gel polish with acrylic?
No. Their chemical curing systems are incompatible, which can lead to under-cured, allergy-causing product.
To perfect your acrylic nail sets, focus on achieving the right liquid-to-powder ratio, maintain salon temperature, avoid over-filing, and ensure arch placement symmetry. Using the right brush size and proper infilling technique prevents lifting and ensures a smooth, durable finish.