
![Your ultimate gel polish troubleshooting guide [Updated]](https://d3sc42dkmius1e.cloudfront.net/media/1736164241shutterstock_2345232903.jpg)
From avoiding shrinkage and chipping to speeding up your technique... Our pros have the answers to all the gel polish problems you might encounter...
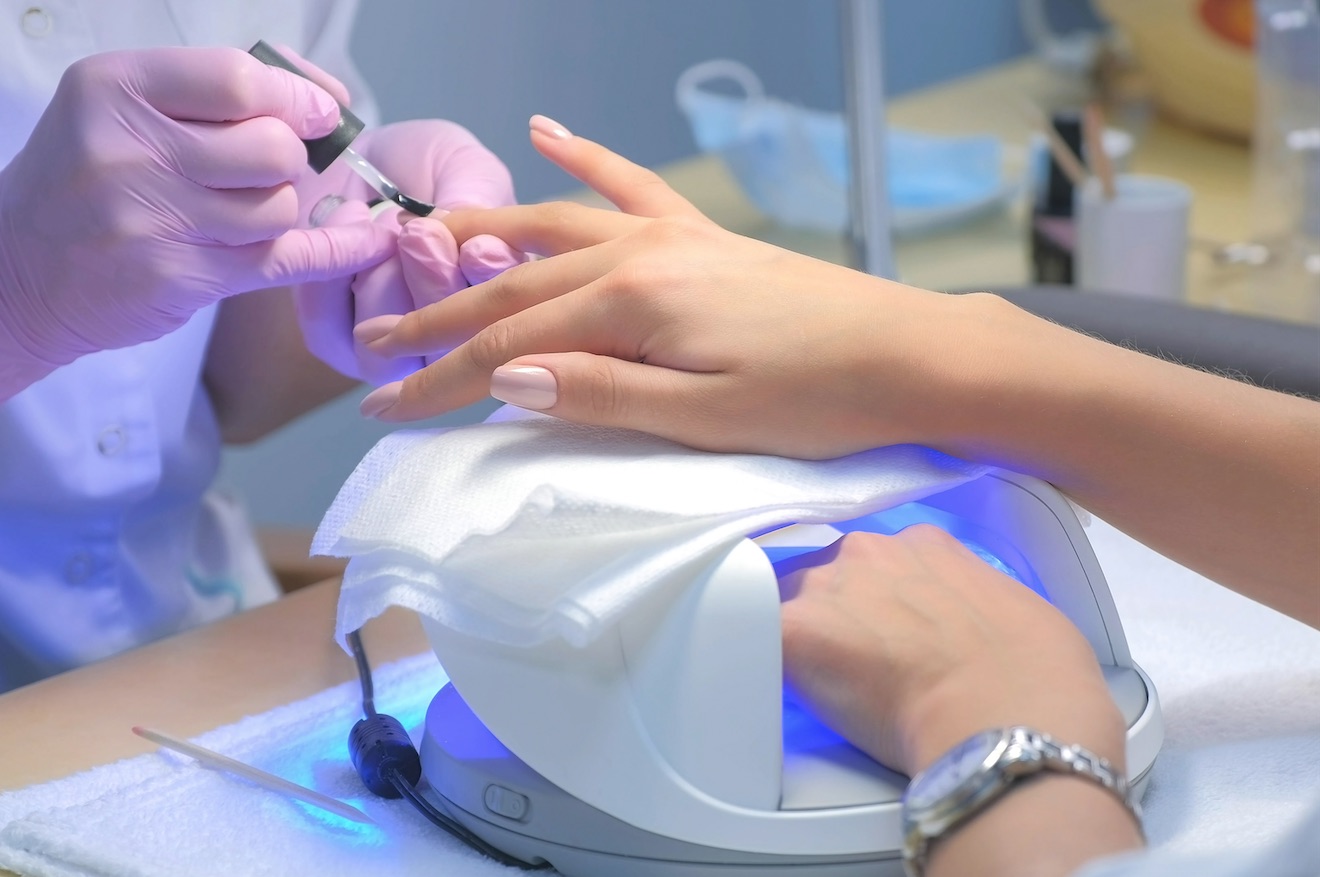
How much time should you spend on prep prior to a gel manicure?
"I get at least four or five emails per week about the longevity of gel-polish manis and 98% of the time it’s due to incorrect nail preparation. Nail prep is sadly often rushed and its importance is forgotten. It’s not until nail techs are having issues with the gel-polish peeling and chipping that they realise they are missing out the most important part of any service," says Tina Bell, head of education at Pure Nails and owner of Totally Polished Nails & Beauty.
"Taking at least 10 minutes to prep will ensure any treatment you apply to the natural nail will adhere correctly. Taking time to apply the gel is equally important. Smooth, thin coats are better than quick, thick ones. If you’re rushing, you risk the chance of over-applying, which can create issues with under-curing gel or rippling in the lamp.
Choosing the right products
[sponsored section]
It is important to use a complete gel system and to avoid mixing and matching products for the best application and adhesion...
OPI Intelli-Gel Super Base Base Coat
OPI’s Super Base Base Coat with exclusive OPI Intelli-Gel Technology keeps nails protected and ensures long-lasting wear by creating a super strong foundation that grips onto GelColor polish.

OPI Intelli-Gel shade shade You Don’t Know Jacques
Feeling mocha-vated to try the new Colour of the Year: #MochaMousse? OPI’s ‘You Don’t Know Jacques’ is a soft brown taupe that will score points with your clients. OPI's custom brush and Intelli-Gel Technology ensures each OPI gel delivers intense pigmentation, colour and even coverage without flooding or rework.

OPI Intelli-Gel Super Gloss Top Coat
This is not your average shine. It's super glossy. Super Gloss Top Coat with OPI Intelli-Gel Technology is OPI’s shiniest GelColor top coat ever that nails a beyond-brilliant high-shine finish that lasts from application to removal. Plus, it locks in nail colour to prevent fading and shifting.

How can I get my client's gel nails to last longer?
"No one wants to have to redo it, so take your time capping the edge of each layer and cleaning up any gel that may have touched the cuticle or skin before setting. This will help the gel to stay put and not lift from the plate," Bell continues.
"Finish the nail with a good shiny topcoat," says Bell. "Lastly, wait for the gel to cool before adding nail oil... applying oil too soon when the gel is warm can sometimes diminish the shine from the finished nail. "Your prep should be done in 10-to-20 minutes. In my salon, a typical gel-polish manicure takes 40 minutes,” says Tinu Bello, founder of Manicured London.
“We normally split that in two – using 20 minutes to file, buff, prep, and the other 20 minutes to paint.”
How can I speed up my UV gel application technique?
“Great application is all about preparation. It’s vital not to rush this part of the process or take shortcuts, as correct prep work is the foundation for any successful nail enhancement. However, there are some tips and tricks that may help you improve your speed,” explains Anna Germaine, director of professional nail care company The Edge Nails & Beauty.
“Electric files will cut filing and buffing time in half, but it is vital you are professionally trained and confident enough to use them as they can be extremely damaging if used incorrectly. Check that your brand of UV gel is self-levelling and then apply the gel in thin layers, especially at the cuticle area, as this will save you time later when you shape and buff.
She adds: “Try flash-curing the first layer of gel for 10 seconds, as this will be just long enough to ensure it won’t budge, allowing you to move on to the next step in the application. For the second layer though, make sure you cure for the recommended time.”
Should I use a builder gel in treatment under gel polish?
“Builder gel has increased in popularity over the past couple of years due to it enhancing the longevity of gel polish and aiding clients in being able to grow their natural nails. It has given nail techs the opportunity to market this as an add-on service, generating more revenue,” says award-winning nail tech Hazel Dixon, owner of Hazel Dixon Nail Artist Academy and Professional Beauty London Nail Competition judge.
“The majority of builder gels have a built-in primer and can be used as a base under gel polish, as well as for building an overlay on natural nails or extensions. The benefit of this is that the tech only needs to invest in one product, saving them time and money.
“The product can then be multi-purposed depending on the client’s needs and the condition of their nails. When the client has very thin, weak nails, then multiple layers of builder gel can be used to add extra strength before application of gel-polish colour.”
Builder gels are typically soak-off but the more layers that are applied then the longer the soak-off time. “You can infill builder gel rather than it soak off every time,” Dixon adds. “In my opinion, it is much kinder to the natural nails and surrounding skin than to soak them off every two weeks."
“Using a builder gel underneath a gel polish can also extend a gel manicure to around four weeks, and this gives most clients the longevity and value for money they’re looking for without any of the usual chips or breaks.
“Nail techs can charge for the application of this as an add-on service and I advise they seek out the proper training – it is paramount to know how to correctly apply and use the product to ensure a trouble-free service.”

While many builder gels are soak off, some especially those that are clear and high shine require removal by file. "Many nail professionals are moving over to e-files and this is especially useful when using a builder gel you want to infill but have applied gel polish over," says Belinda Price OPI's UK and Ireland education manager.
"Of course, you can hand file if you prefer, but for those looking to reduce treatment time, or to avoid repetitive strain injury then e-files are proving a popular option."
How can I apply gel polish close to the cuticle?
“The more time you can spend preparing, the better your gel-polish manicure will be. Cuticles are key so make sure you always push back and remove your client’s excess cuticle,” says Claire Aggarwal, chief operating officer at Renew Beauty and founder of Perfect 10 mobile beauty and chief operating officer at Re:new Beauty, which distributes Bio Sculpture.
“Take your time. Currently, everyone is obsessed with five-finger curing. If you are painting properly it takes around 30-40 seconds to paint two nails. So, once you have painted one coat of gel onto two nails, ask your client to pop their hands under the lamp.
“This prevents shrinkage and ensures the product stays as close to the cuticle line as possible. It won’t slow your application down. And remember, picking the right brush to paint your gel manicure is as important as picking the right gel.”
What are the key things to remember to stop shrinkage and chipping?
“Shrinkage happens when there is something on the nail bed that shouldn’t be there. The things that cause gel polish to shrink is putting oil onto nails before a manicure or telling your client to wash their hands prior to the treatment,” explains Bello.
“Gel polish must be applied on a clean, dry base, and it has to be the right pH balance as well. Using products like a scrub, acetone or a pH bonder will make the nail plate the correct pH balance, and this means you shouldn’t have any shrinkage.”
"Always prep well, follow manufacturer's guidelines on application, use the whole system and correct lamp and keep up with training," says Price. "If you are having problems and following all of those steps consider the client needs something stronger, such as a builder gel or special gel-polish base coat designed for weaker nails."
How can I make chrome over gel polish last?
Over the past year, we have seen a sharp rise in the use of chrome powder thanks to the “glazed doughnut” nail trend that exploded in 2022. It involves using a pearlescent powder over a nude base to create a glazed effect.
For a glossy, smooth look, the powder is best buffed into a no-wipe topcoat before it is sealed with another layer of topcoat.
“My top tip for getting a good chrome manicure to last is to make sure you use a small amount of product, a little really goes a long way,” says Clawgasmic founder and chief executive Chantelle Vermont. “Use your finger to really rub the powder into that cured layer of no-wipe top coat.”
Chrome can be prone to chipping thanks to the powder product in between the layers of the top coat.
Vermont says: “File the free edge ever so slightly after you have applied your chrome, and then go over it with two layers of top coat – either a clear builder layer followed by a no-wipe top coat, two layers of no-wipe top coat or a layer of base coat then a layer of no wipe top coat – double coating gives that extra layer of protection. Try out different methods as different things work depending on what brands you are using."

How can I create gel-polish nail art?
“Creating nail art with gel-polish doesn’t have to be complicated; simplicity is often the key for amazing results. When starting out, it’s important to get yourself equipped correctly. Invest in a couple of good brushes, such as a long striper and fine detail, and then learn how to use them well,” explains Julie-Anne Larivière owner of Sketched by J-A Nails.
“When it comes to learning different designs, choose one pattern to master and then take your time practising it. One of the most common issues you’ll face is that gel-polish tends to spread when applied over a tacky residue. Always wipe residue off before doing any artwork because it avoids the polish looking like a splodge.”
She adds: “You should also give the final design an extra cure to make sure it has dried well before you apply the top coat, which I gently dab on with a top coat brush to avoid colour dragging and a messy finish.”
How much should I charge for my gel polish nail art?
“I always go by the £1 per minute rule. This may differ depending on where you live, your salon price point and the competition nearby, but do charge what you’re worth,” advises Bello.
“The only way you can get the price right is to know how long it will take you to do the nail art. You don’t want to tell a client that you can do marble nail art in 20 minutes, and charge them £20 for that, when in reality it will take you 50 minutes. Price your nail art accordingly.”
How can I warn clients about the dangers of DIY gel polish kits?
“Instructions are poor in DIY gel-polish kits, with little precautions included on the packaging and no warnings about avoiding skin contact. The lamps are often poor quality and will be unlikely to give a correct cure; just because the product appears cured, it is not necessarily thoroughly cured. DIY kits also don’t often have MSDS (material safety data sheets),” says Katie Barnes, owner of Katie Barnes Training Academy in Warwickshire, founder of the Katie Barnes Tool Range, and PB’s Nail Professional of the Year 2018.
“When the user doesn’t understand the chemistry or the anatomy of the natural nail how can they prep it without damage? Without this understanding, the user may also offer to carry out a treatment on their friends or family with good intentions, but if something goes wrong, they may find themselves with a claim against them and no insurance to cover themselves in case of such an event, as a professional should – and more than likely would – have.
“Many home users and even some so-called professionals are turning to third-party online retailers to purchase what they assume is a genuine but cheaper product. Professional, reputable brands will not list their products on third-party sites and therefore there is no guarantee of what is being purchased.”
"It’s a message that has to be given in the right way," says Price. "You must make it clear that salon gel-polish treatments are safe as they are done by trained professionals, using professional products bought from authorised stockists."
"Meanwhile, DIY manicures may not be cured properly, could result in gel getting on the skin, may use products of dubious quality or even fakes, or products that contain ingredients banned for use by consumers because of the risk of allergy," she continues.
"Once you explain, the clients may disregard your advice, we can’t make them take it onboard, but we do have a duty to explain, ask them to be careful moving forward and let them know you are there if they have any questions."

square.JPG)