Nail art step by steps for Easter
By Shona Owen, editorial intern
We asked the experts to put together some simple designs, so you can celebrate Easter this weekend with some egg-cellent nail art for your clients.
CND Mini Chocolate Eggs
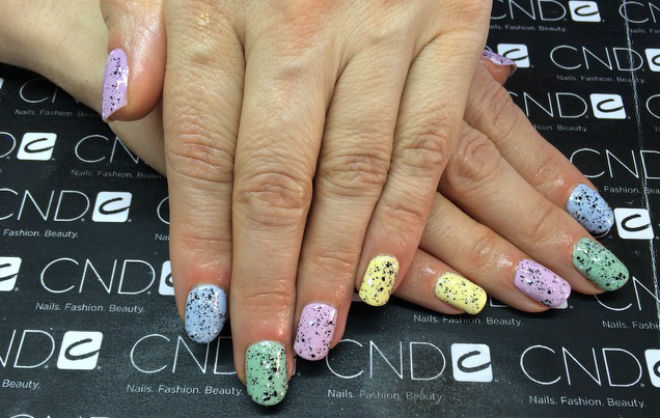
Inspired by Cadbury’s Mini eggs, CND nail technician and owner of the eponymous bespoke nail salon in Grimsby, Julie Bryan has created these chocolate-y good designs
Step 1
Prep the nails using CND Preparation Products
Step 2
Apply a thin layer of CND's Shellac basecoat and cure in the CND lamp for 10 seconds
Step 3
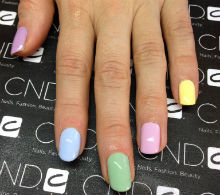
Select your choice of CND Shellac colours and apply two coats, curing each for two minutes in the CND lamp
Step 4
On a thumb palette or tile, mix a few drops of CND Top Coat with matte black and white multimix glitter with a CND flat gel brush and cure in the CND lamp for two minutes
Step 5
Using CND Top Coat, finally seal your glitter and cure for two minutes
Step 6
Wipe inhibition layer abd apply cuticle oil
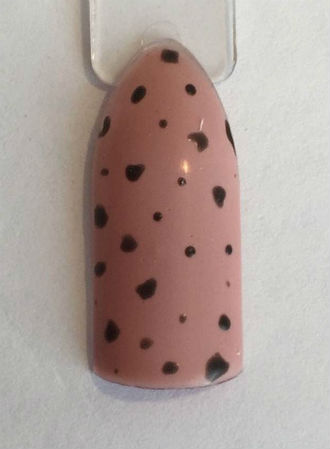
Gellux Speckled Egg
Salon System educator Rachel Gribble has created this guide for speckled egg nails, using the new Gellux in the Buff 30 second gel nail polishes.
 Step 1
Prepare nail and clean with Gellux Prep + Wipe, and apply Gellux Fast Bond and allow to dry for 60 seconds.
Step 2
Apply Gellux Easy Off Base Coat, then cure, 30 seconds with LED or two minutes in UV.
Step 3
Apply two coats of Gellux Blush from the new In the Buff collection, curing for 30 seconds (LED) or two minutes (UV) between each layer
Step 4
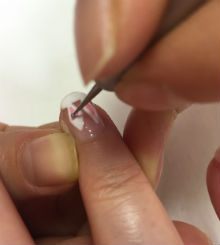
Using a dotting tool dipped in Gellux Black Onyx, apply different sized dots all over the nail and cure for 30 seconds (LED) or two minutes (UV)
Step 5
Apply Gellux Shiny Top Coat to nails and cure for 60 seconds (LED) or three minutes (UV)
Step 6
Wipe of the sticky layer with Gellux Prep + Wipe and apply Naillux Cuticle Cream to moisturise the skin around the nails.
OPI Bunny Ears & Bunny Behind
Hopping into action this weekend, OPI's step-by-step nail designs feature easy-to-polish rabbits
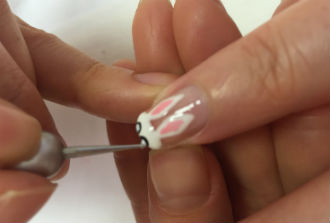
Bunny Ears
 Step 1
Apply base boat and cure
Step 2
Using a dotting tool, apply a medium dot of OPI Alpine Snow to the tip of the nail, swirl the gel to spread it to make the top of the head
Step 3
Using a smaller dotting tool, drag the gel up towards the cuticle, to create the ears. Try to give some shape rather than just a straight line, and then cure
Step 4
Apply a second coat of Alpine Snow over the first and cure
Step 5
Apply Suzi Shops and Island Hops, from the OPI Hawaii collection, inside the ears, again using a small dotting tool and cure
Step 6
Apply two dots of OPI Lady in Black at the very edge of the nail for the eyes and cure
Step 7
Apply two dots of Alpine Snow inside the eyes and cure
Step 8
Apply two dots of Lady in Black over the whites of the eyes and cure
Step 9
Apply top coat and cure
Bunny Behind
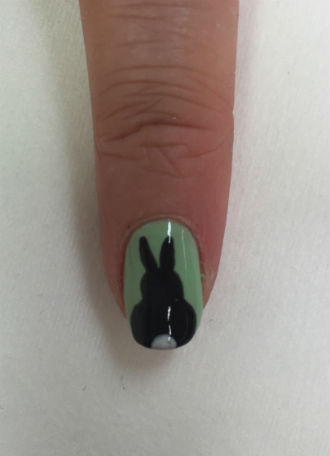
Apply base coat and cure
Step 2
Apply two coats of That’s Hula-rious from OPI's Hawaii collection and cure
Step 3
Apply one large dot of Lady in Black to the tip end of the nail and swirl to make the body
Step 4
Apply a second dot of Lady in Black above the first to create the head of the bunny
Step 5
Drag up using a dotting tool to create the ears and cure
Step 6
Apply a second coat over the Lady in Black and cure
Step 7
Apply a small dot of Alpine Snow at the bottom of the body of the bunny for the tail and cure
Step 8
Apply a second coat to the tail if needed, then apply a top coat and cure